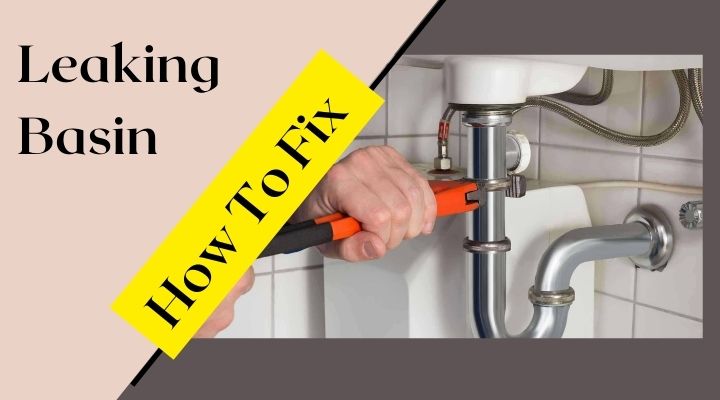
In this article I will walk you through the step by step process to stop your base and waste from leaking. We’ll talk a bit about methods and tips. Unfortunately, with a lot of these slotted basin wastes the washers that come with it arent great and they can allow water to leak.
So theyre not almost reliable so what tends to happen is the water makes its way down the threads and it travels between these small voids between each thread and there’s a very small gap between the threads and the knot and that’s where the water leaks out so what we need to do is fill the voids in the threads to eliminate the gap between the knot.
In that way, we should have a nice watertight seal. So you get two different types of waste. You get on Slaughtered, which is for sinks without an overflow. You also get slotted which, as you can see right, has a slot in it and that’s going to be used for sinks with an overflow.
Now, it is also worth mentioning you get different design wastes for your sync depending on what your preferences are some of them include click clack flip top plug and chain and many others now the size you’re going to want to go for is the 32 mil in metric art and imperial money the inch and a quarter okay so there’s a whole range of products on the market you can use that will help prevent your basin waste from leaking ive broken these down into four main categories for you which are tape and cord waist seal, kits plum spotty and finally sealants and adhesives.
Now I am about to show you how to do this job a variety of different ways with the items you can see on screen so you can decide for yourself which way best suits you. The first method I am going to do is probably the easiest and cheapest way to do the job.
So lets go ahead and start there so as you can see we have a few different items on the screen here. The one we were intending to go for is the PTFe tape. The main reason for this is the tape is 30 pence a reel whereas the hemp and the cord is several pounds so just for cost effectiveness were gonna go for the PTFe tape. So what im doing here is putting some screwdrivers in the base and waist and this should prevent it from turning so next we need to loosen off the knot at the top there with some water pump pliers then loosen off the nut at the bottom where the bottle trap is and then finally loosen off the last knot that connects the pipe to the base and waste and you can go ahead and take off the knot with your hand and pop the washer off with it. Next, I like to just put a little mark on the base and waste.
This will let me know where to put the ptfe tape im going to take the base and waste out so with the basin waste in your left hand where that blue mark is you want to wrap PTFE tape about two inches wide all the way around looking at the base and waist head on you want to go in a clockwise direction so with the base and waist in your left hand and PTFE tape in your right hand you want the tag of the ptfe tape towards the back of the reel pinch the tape with your left thumb and put tension on the reel as you turn it around the base and waist four or five times the tape is going to help fill the voids between the threads and this should prevent water from leaking.
Now on the left hand side of the screen there is hemp which is an old traditional method of doing it and you should only need three to four turns as its much thicker and there’s also at the bottom of the screen loctite cord which is a newer product on the market youll need probably 10 to 12 turns and this again should help prevent water from leaking so what you want to make sure is the slots of the base and waste that line up with the overflow of the sink so make sure that’s all in line and pop the bass and waist in.
So everything lines up nicely and i like to mark it as well so if it turns i can make sure i line it back up with that mark then what you want to do is tighten the nut all the way up the threads hand tight tighten the pipe back on and attach the bottle trap then im just going to nip up the knot with my water pump pliers and there we have a nice water tight seal now.
Another really effective way of sealing off your base and waste is using something called a base and waste seal kit. Many plumbers merchants and screw fix tool stations sell these.
To make installation easier, you can spray silicon or fairy liquid on the seal kit. This will just help it slide on a lot easier now get the rubber cone and push it all the way up the threads then get your polystyrene washer and push that on like so and then finally the white cap place underneath and then you want to get your knot and run it up the threads as tight as you can by hand and then were planning to go ahead and nip it up with the water pump pliers a couple more turns and there we go and again you just want to attach your pipe to the base and waste and at the bottom reattach the bottom trap and just nip them up like that.
As you can see we have a nice watertight seal so the third method of sealing off your base and waste is using a product called plumber’s mate. A lot of professional plumbers use this and its a great way of sealing off leaks so grab some plumbers mate out the tub you only need a small bit for this a piece about that size then go ahead and roll it about a quarter of an inch thick then what you want to do is place the plumbers mate underneath the flange all the way around like that.
Then what you want to do is give the sink a quick clean just where the plumber’s mate is going to be sitting. Then sink the base and waste into the hole like so and push down firmly. Now grab yourself some more plumbers, we’re going to do the same thing, but we’ll need a much larger piece this time.
We did last time and were going to roll it out this time about half an inch thick also going to need some of these washers these are from screwfix theyre an inch and a quarter polysink washers and these are just going to help with installation so grab your plumbers mate and what you want to do is wrap it around the threads then grab your washer and push your washer on then get your knot and hand tighten the knot all the way up the threads once youve got as tight as you can with your hand then get some water pump pliers and just nip it up the rest of the way.
And you’ll see the plumbers mate oozing out the top there just get your hand and take the excess away just like that and there you have it no leaks whatsoever and finally the last method im going to show you is sealants and adhesives so there’s a variety of different sealants and adhesives you can get on the market on display in front of you is just some of my personal favorite ones. So on the right hand side here we have the no-nonsense sanitary silicone sealant. I have used the sealant many times and it is a very good value for money sealant. You can pick it up from Screw Fix.
The next sealant in the middle here is plumbers gold and this contains a micro band which is supposed to prevent mold and discoloration for 10 years its one of the best quality sealants on the market and its one of my favorite sealants to use and finally on the left hand side we have ct1 which again is a very good quality ceiling and is going to be the one I am going to use today with most sealants you have to wait for them to cure before you can use your sink and with ct1 you can actually use it straight away which is a good advantage compared to many other sealants so what im doing here is applying the ct watt sealant around the edge of the hole where its recessed and just apply a generous bead all the way around.
Once that’s done go ahead and grab your base and waste and pop that in and push down firmly and then just wipe any excess away. Now what I’m doing here is applying sealant at the top of the threads between the threads and the bottom of the sinkhole. Make sure you apply the sealant all the way around so you get good coverage and now pop your washer on all the way up and push it on firmly.
Once you’ve done that run your nut all the way up the threads then wipe away any excess with your hand. Last but not least, you’ll want to snip it up with some water pump pliers. Once you attach your pipe back to your base and weight that should give you a nice water tight seal.
